
.png)


#AddItInPostPost (2025)
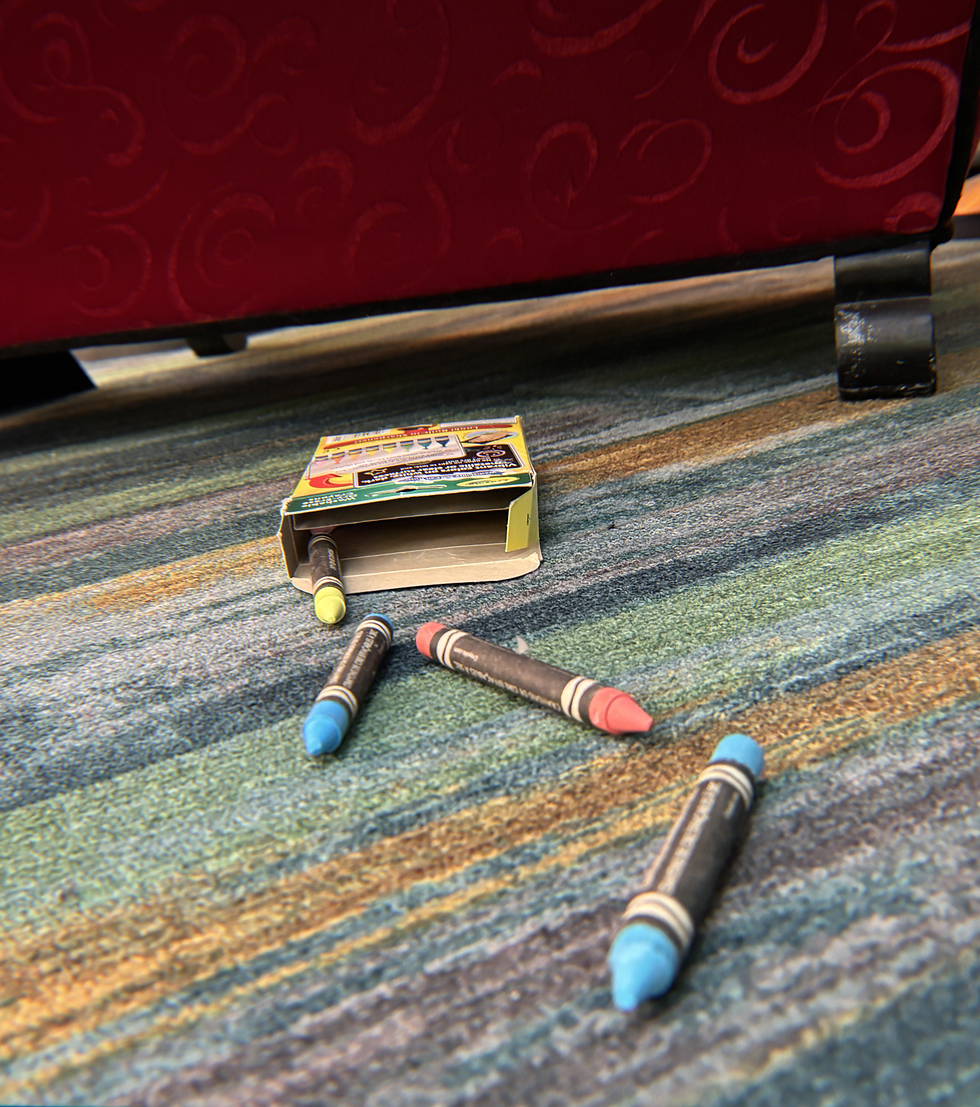
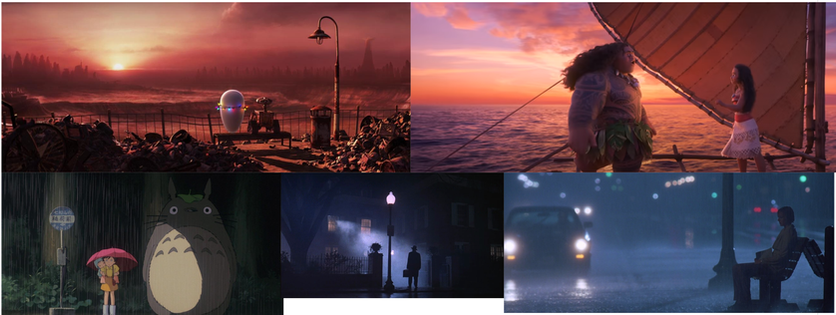
While working as a CG trainee at Nickelodeon through the Nick Artist program, I had the opportunity to work on a social media series that would be posted semi-weekly. Since my mentors, Dustin Scholl, Michael Launder, Sica Von Medicus, and Sean Goldman, interestingly all have VFX experience, I thought it was a really cool and rare chance to learn VFX from professionals while working in animation.
My #additinpostpost series consisted of me making a 3D object, compositing it into a photo or video, and posting it on Instagram of course with a simple breakdown or tutorial every two weeks. As a added element of fun, each object/composition paid homage to a different Nickelodeon movie. Since I was busy with production work during the day, I would often work after hours on this assignment to get everything finished on time. You can see the posts on the Nick Artist Program Instagram page here: https://www.instagram.com/nick_artists/?hl=en
I am thankful for this project because over the 20 weeks and 11 posts, I learned how to work fast and work smart. Even though I was working mainly as a lighting artist at the time, this project allowed me to model, texture, layout, groom, and explore different mediums and play in a sandbox.
Week to week, I would switch software I render in and then would composite in Nuke: Houdini, Maya, Unreal Engine, and one time I just lit and rendered everything out of Nuke.
Software used: Maya, Substance Painter, Unreal Engine, Houdini, Nuke
Can you spot the CG objects?


Student Accomplice (2024)
Lighting and Compositing
Student Accomplice began production in January of 2023 and was completed in June 2024. I worked mainly as Lighting Lead and additionally as a Rendering and Compositing Artist.
Some of the Awards our humble film received include:
2025 College Television Award Winner, 2025 VES Award Nominee, 2024 Student Academy Awards- Bronze Award, and 2024 Rookies Film of the Year.
Reference:
My work on the film's lighting began by finding reference to guide its look. Art Director Brandon Beltran and I were initially interested in the vibes of Pixar's Soul and Onward. We liked the cool fill light paired with the warm key light of the sun, and appreciated the rich, lived-in feeling of the city that hinted at imminent action. I would use this reference to light the establishing shot of our film and make a basic, easy to use light rig for the exterior shots for the rest of this sequence.
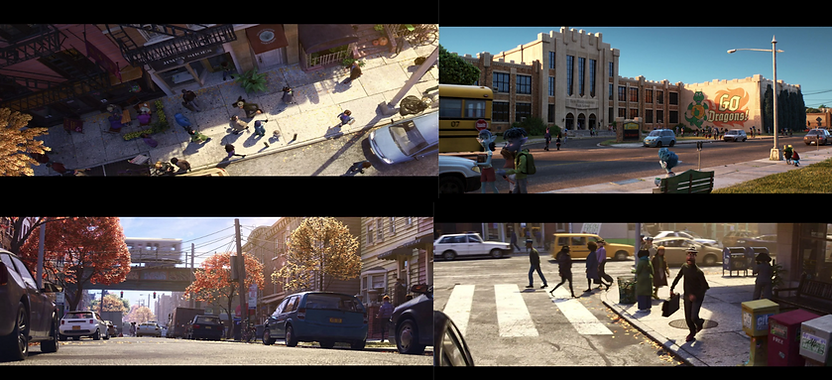
Establishing Shot - Key and Fill for light rig
When we started lighting on the chase scene, we realized we needed to do a lot more research and gather more reference. I watched so many car chase clips and films involving characters in cars that my google slide presentation of reference expanded to more than 100 slides! However, the trio of movies that I used to get the key to fill ratio, feel, and energy for were Baby Driver, Boss Baby 2, and Bad Guys (I jokingly suggested we change the name of our film to something that begins with "B" as an homage to these movies).
With Baby Driver, it was really helpful to see how light behaved in live action cinema: the characters would go in and out of shadow, there was a strong sense of inside the car vs outside through exposure, and it was interesting to see how blown out the background got.
The horse chase scene in Boss Baby 2 helped with colors and composition for exterior shots especially. There would be times where I struggled with clarity and would watch that sequence to see how they problem-solved issues. I learned to add atmospheric volumes in comp to pull back distracting background elements and to treat the street as a stage for the car to perform in and use shadows as a way of bringing focus to the car.
Bad Guys taught me how to push character lighting, add lights that show the car moving in and out of shadow, and to not be afraid of long, expressive shadows.

Car Light Rig:
One of the most important things the lighting team had to learn for our car chase heavy film was how to light characters in a moving car.
As I was building the light rigs for the sequences, I prioritized simplicity and readability, especially since the locations of the shots covered a large set. We had 2 base light rigs: one rig for character lighting and one for set/environment lighting.
Character/inside the car, we had a hot key and soft wrap constrained to the outside of the car to help with character shaping.
The main environment lit with an overcast hdri dome light, then a distant area light as our sun. I learned that distantly placed lights are our friend, especially when characters are traveling large distances. I also enjoyed adjusting the sun to art direct puddles of lights and intrigue for the car to drive into/through. Please see examples in the video below!
USD Workflow:
This project was made with a USD workflow. For each environment asset, there were two versions: the render geo and a lower poly proxy. This came in handy when we were lighting because we could easily switch the purpose in Solaris to make the file run faster and be more stable.
Our pipeline was also built so that each shot contained an Environment Layout, Animation, Camera, FX, CFX, and Lighting USD file, so people from different departments could work on the same shot at the same time. We had a node where we could choose which department files we want loaded in our scene, so a person working on CFX can uncheck layout and not have to load the whole city into their file. When a department finishes working on their file, they can then push their changes by overwriting their USD file.
This was helpful for lighting because we did not have to wait for FX or CFX to finish before starting to light our shots, and it was helpful for FX because they could see how their work looked with our lighting. Also, if our files were running slow, we could disable a department to lighten the file.
USD and Solaris helped keep our files organized, customizable, and easy to navigate.

USDs also were useful when compositing: Our comp lead Spencer Blanchard made a gizmo that brought in the geo for the eyes, computed its normals, provided position to light as an attribute, and computed a highlight that could then be merged over in the comp node tree. This gave us control over whether to have the eyelight move in world space or head space. We wanted the eyelights to feel organic so we used world space by default but if characters' heads moved quickly in a shot, we would have the eye light follow the eye.

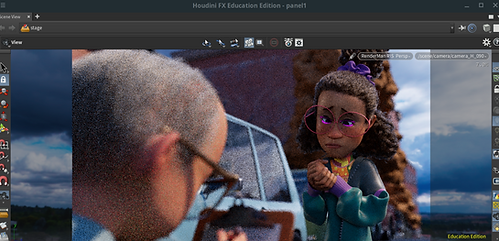
(Fake) Deep Compositing
Another Comp tool that we used to help improve lighting was Fog and Set Extension with our cheaper version of Deep compositing. Spencer Blanchard found that if we used the positional and normal data from the EXRs, we can recreate our scene in 3D and place cards to add fog, set extension buildings, and even potholes on the road.
Stylized Street (July 2024)
After graduating and finishing production on my senior short film "Student Accomplice" in June, I challenged myself to make a stylized piece.
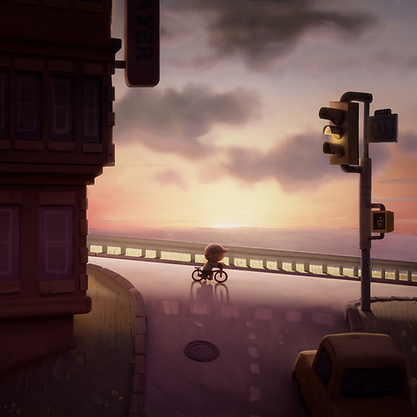
I adore the playful style of artist Amerlicart and thought it would be a fun challenge to recreate their street scene. I modeled the scene in Maya, textured the scene in Substance Painter, and assembled the scene in Houdini. I used their book “主線なし”イラストの描き方 (how to draw illustrations with no outline) as reference for shading and rendering.
While shading, I had to trust that how the scene looks in Substance Painter is not what the final piece would look like. It was difficult to determine what colors are achieved in shading vs lighting and ended up going back and forth between Houdini and Substance.
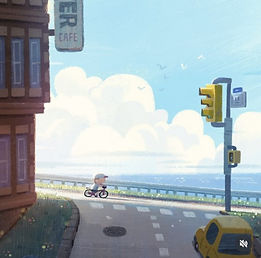

Concept by Amelicart

Final Render and Comp
Scene in Substance Painter
After I got a pass at the original lighting, I thought it would be cool to have different iterations and light based on the traffic light colors: yellow light is slow, warm, sunset full of hope and relief; red feels like the world is trying to stop and reject you.

Urashima Taro Bar Scene (Fall 2023)
Lighting, Shot Composition, and Comp
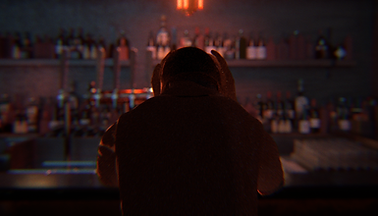
In the Fall of 2023, I got to TA and help reestablish a lighting class at my school. Throughout the semester, we lit projects in Houdini, Unreal, and Katana as we learned lighting principles, like Color Theory, 3 Point Lighting, Character Lighting, and Shaping. In one project, we lit SideFX's Bar Scene in Houdini Solaris. Before lighting the scene, we came up with a story, then gathered references, lit the environment to create a master lighting, and then added characters and different cameras. In a class of 10 students, it was very fun to hear everyone's stories and how they lit a scene differently.
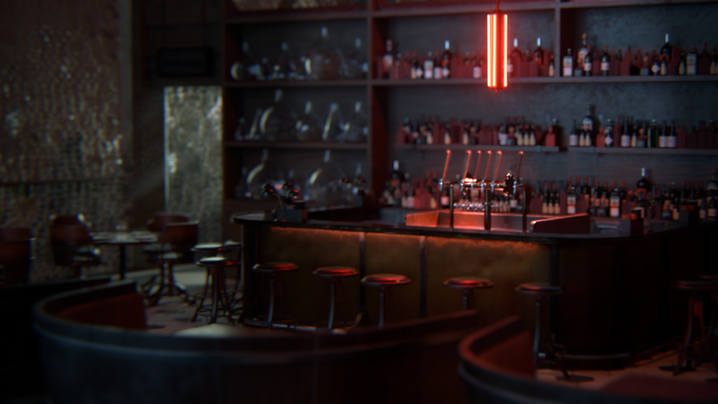


My story is a continuation of the Japanese folktale Urashima Taro: after saving a turtle and spending a few nights at an underwater kingdom, Urashima comes home to find out that because of time dilation, he has travelled many years to the future. Since all of his family has passed away, he decides to return to the underwater kingdom and experience immortality.
Urashima spends his days in a bar to drown away his sorrows. However, the turtle and dolphins eventually bring a young girl to the palace. Will Urashima snap out of self-pity to warn the girl of the true nature of the kingdom? Will he risk losing immortality to help a girl return home?

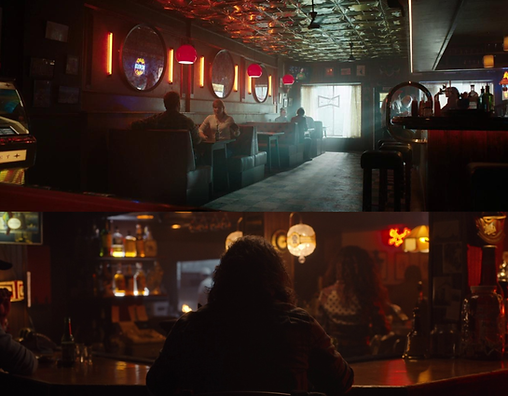
Some of the references I used to light the scene and my shots (from Jurassic World, Nimona, Puss in Boots Last Wish, Little Women, and Joker) - I wanted to use references that had interior lighting and a combination of Warm and Cool Lighting. I wanted the red light to feel dangerous, dingy, and alienating, while the cool light to feel refreshing but uninviting.
The Witch's Cat (2023)
Lighting and Compositing on the BYU Animation Class of 2023 Capstone Film
In Fall 2022, I started working as a research assistant and lighting artist for this project. I worked with my lighting lead Lauren Von Bose Wood who gave me great feedback and encouragement as I started learning how to light on a production.
In the earlier stages of production, I experimented with lighting in Unreal Engine- we had mostly previs animation in UE and worked closely with the art director to see how we much wanted to match color keys. Because of Unreal Engine's fast render times, we were able to iterate quickly and have a good idea of what we wanted before lighting in Houdini.
Then, as the first sequence was ready to light, I worked on shot lighting in Houdini. Our process consisted of using the color keys and various films as reference- some of the films I used as reference was Harry Potter, Encanto, and Tangled. It was not uncommon for things to break, so I learned how to reexport animation, check shader connections, and recache hair sims.
Finally, towards the end of production, I was able to do the master lighting for two sequences- I learned that if your lights are going to be used by other people, you need to give them proper names and be intentional with each light.
I comped my shots in Nuke- I would adjust color values with color grade nodes and use rotopaints and masks to fix clipping geo. One common problem, we had was a hole showing up in the witch's knit scarf. To fix this, we would paint a patch, then use Nuke's smart vectors to distort that patch over the shot.
It was an amazing experience to learn how to work with a group of students. Even though we had a lot of late nights, I loved seeing all the departments' amazing work fully come together in lighting and compositing.
Software: Solaris for Houdini, Nuke
Renderer: Renderman 24
Cacao Hut (2023)
This is my final for my Shading Class. I am responsible for all aspects (except the small pots and background terrain). I specifically wanted to create a project where I could practice different lighting set ups. I had a lot of fun, and learned a lot more procedural modelling than I was expecting.
I was able to learn a lot more of Houdini's tools: including the Instancer node to instance four variations of leaves on the hut that would then be simmed with reverse gravity to lay on top of each other; using curves and sine waves to art direct the different trunks for the spiral tree, and making a procedural bridge tool.

Programs Used: Houdini, Substance Painter, Maya, Nuke
Renderer: Renderman 24
Based on Art by Seiji Yoshida
Cozy Rice Cooker and Fan on Fire - FX and Lighting (Summer 2023)
During Spring 2023, I took a VFX class. I had fun learning about what FX could be made in Houdin, but I more importantly had fun having more things to light. Here are a couple of my final projects from the class
The only cooking appliance I had my freshman year of college was a cheap rice cooker. I would use my rice cooker to not only cook rice, but boil eggs, make mac and cheese, heat mashed potatoes, and many more. I have very fond memories of using that rice cooker and making random food at late hours of the night. I tried to incorporate those cozy feelings that rice cooker gave me.
Responsible for FX, Lighting, Rice Cooker Shader, Layout
One time my family bought small hand fans for the Japanese heat, and my grandfather said, "You better be careful because those things catch on fire." His words came to mind when my class was assigned to do a pyro sim.
Responsible for the sim, fan shading, layout, lighting, and comp
Rendered in Karma and comped in Nuke
Procedural Strawberry (Fall 2022)
Strawberry Daifuku and Procedural Strawberry: Responsible for all aspects. For my shader programming class, we were assigned to use Substance Designer for the base color and Houdini to use layers of noise and nodes to procedurally shade a fruit.
Programs/Software used: Maya, Houdini, Substance Designer, Substance Painter, Karma
Lite Brite (Fall 2022)
Lite Brite: For this project, I modelled and textured a lite brite toy. I then wrote a program that takes an image (or image sequence) and outputs obj files that contain where the corresponding colored pegs should be, which can be taken into Houdini and have peg geometry copied onto those points.
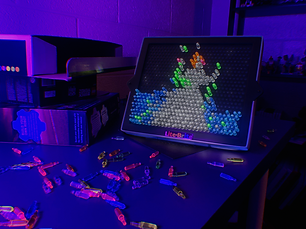
Programs/Software used: Houdini, Maya, Substance Painter, Substance Designer
Renderer: Renderman 24